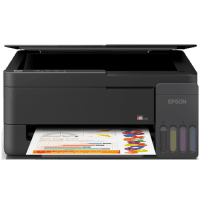
Epson EcoTank L3310 Printer Manual
 | PDF manual |  | 154 pages |  | English |
Brief summary:
-
Printing Documents
-
Load paper, open the document, select Print, choose the Epson printer, adjust the settings, and start printing.
-
Select the correct paper size, paper type, and print quality.
-
-
Copying Documents
-
Place the original face-down on the scanner glass, aligned with the corner mark.
-
Use the black-and-white or color copy button to start copying.
-
-
Scanning Documents
-
Place the original face-down on the scanner glass and close the cover gently.
-
Scan to a computer using the printer’s control panel or Epson Scan 2 software.
-
-
Loading Paper
-
Load paper in the rear paper feeder with the printable side facing up.
-
Align the edge guides with the paper and do not exceed the recommended paper capacity.
-
-
Printing on Special Paper
-
Select the appropriate paper type for photo paper, envelopes, or other supported media.
-
Load envelopes with the short edge first and the flap facing down.
-
-
Checking and Refilling Ink
-
Check the ink tanks regularly and refill them before the ink falls below the lower line.
-
Use the correct Epson ink bottles and reset the ink levels after refilling.
-
-
Maintaining Print Quality
-
Run a nozzle check when printouts show missing lines or incorrect colors.
-
Clean the print head when necessary. Cleaning consumes ink, so avoid unnecessary cycles.
-
-
Cleaning and Aligning the Print Head
-
Use print head alignment to correct misaligned lines or blurry results.
-
Power Cleaning or Power Ink Flushing may help with persistent ink flow problems, but they consume more ink.
-
-
Maintaining the Printer
-
Clean the scanner glass and paper path when dirt or ink smears affect results.
-
Replace the maintenance box when prompted. Do not attempt to replace internal ink pads that require authorized service.
-
-
Troubleshooting and Printer Care
-
Check the control panel lights and computer messages to identify errors.
-
Remove jammed paper carefully and always turn the printer off using the power button before unplugging it.
-
Common User Problems and Solutions
1. The Printer Does Not Print
-
Check that the printer is turned on and connected to the computer through USB.
-
Confirm that the correct Epson printer is selected.
-
Check for error lights or messages and cancel any stuck print jobs.
-
Make sure the initial ink charging process has been completed.
2. Paper Does Not Feed
-
Load paper in the center of the rear paper feeder with the printable side facing up.
-
Align the edge guides and avoid loading too many sheets.
-
Flatten curled or folded paper before loading.
-
Confirm that the paper size and type settings match the paper being used.
3. Paper Is Jammed
-
Remove the jammed paper carefully, following the printer’s instructions.
-
Check for remaining paper inside the printer.
-
If the error continues, load A4 or Letter paper in the rear feeder and press the appropriate copy button to help remove remaining paper.
-
Contact Epson support if the error cannot be cleared.
4. The Printout Has Missing Lines or Incorrect Colors
-
Check the ink levels in all tanks.
-
Print a nozzle check pattern.
-
If gaps or missing colors appear, clean the print head and check again.
-
Use Power Cleaning only when standard cleaning does not resolve the problem.
5. Printed Text or Images Are Blurry
-
Select the correct paper type and print quality.
-
Check that the paper is suitable and not curled or damaged.
-
Run print head alignment if lines appear misaligned.
-
Clean the scanner glass if the problem occurs in copies or scans.
6. Copies Have Spots or Lines
-
Clean the scanner glass using a soft, clean, dry cloth.
-
Make sure the original is placed face-down and aligned with the corner mark.
-
Close the document cover gently and ensure no dirt is on the glass.
7. Ink Levels Appear Incorrect
-
Visually check the ink levels in the tanks.
-
Refill the tanks to the upper lines without exceeding them.
-
Reset the ink levels after refilling so the printer can update its estimates.
8. The Printer Makes an Error After Being Turned Off
-
Turn the printer on and follow the instructions indicated by the control panel lights.
-
Cancel pending print jobs if necessary.
-
Run a nozzle check because the print head nozzles may have dried or become clogged.
-
Always use the power button to turn off the printer and wait for the power light to stop flashing before unplugging it.
9. The Maintenance Box Needs Replacement
-
Replace the maintenance box when the printer indicates that it is nearing the end of its service life or is full.
-
Ensure the new maintenance box is installed correctly.
-
If the warning concerns an internal ink pad, contact Epson or an authorized service provider.
10. Scanning Does Not Work
-
Check the USB connection and confirm that the printer is powered on.
-
Make sure Epson Scan 2 is installed and the correct scanner is selected.
-
Restart the scanning application.
-
If the problem continues, reset Epson Scan 2 Utility or reinstall the scanner software.